
I once cringed as I stepped on stray litter tracked across my living room. That gritty feeling bothered me. I needed a better system to contain the mess.
A specialized litter mat with a textured or dual-layer design is best. It catches granules from your cat’s paws right as they exit the box. Rubber or PVC-based mats also resist spills and are easy to shake or rinse clean.
I remember how often I had to sweep before I found the right mat. Now, let’s dive into the common questions about keeping a cat’s litter area tidy.
Why does my cat get litter everywhere?
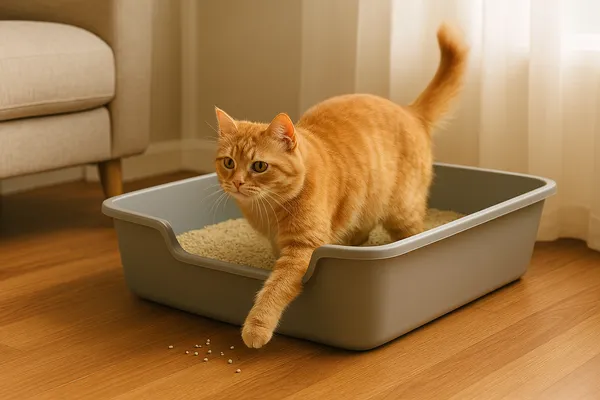
I used to see my cat enthusiastically digging, then bursting out of the box in a flurry of stray litter. It confused me. I felt frustrated at the constant cleanup.
Cats scatter litter because they have a natural instinct to bury their waste, often kicking with gusto. Some litter types also stick to paws, leading to tracked granules. A shallow or cramped box can make the problem worse.
Unpacking the Litter Scatter Problem
I remember the first time I found clumps of litter in unexpected places, like on the couch or even under the coffee table. I thought my cat was being mischievous, but it actually came down to natural behaviors and a few environmental factors. Understanding those factors helped me reduce the daily mess.
Cat Instincts and Environment
Cats are wired to bury their waste. This is a behavior inherited from their wild ancestors who wanted to hide their scent from potential predators. When your cat scratches around in a small or shallow litter box, litter inevitably flies out. Overly fine litter grains can also cling to paws. Once your cat exits the box, those particles get shaken loose as she walks or jumps.
High-Energy Digging
Some cats have bursts of energy right after using the litter box. My cat often sprints away at top speed, launching litter in multiple directions. If the box’s sides are low, there is little to contain that flying debris. Covered boxes help for some cats, but if your pet dislikes an enclosed space, that option might backfire. You have to find a balance that suits their preferences.
Litter Material
I experimented with many types of litter: clay, silica crystals, paper pellets, and more. The lightweight litters tended to stick to my cat’s paws and fur. Heavier or pellet-style litters tracked less. However, each cat has a personal preference. Some cats reject certain textures, so you may need to test a few until you find one that both you and your cat can live with.
Table: Factors Influencing Litter Scatter
| Factor | Effect on Scatter | Possible Solution |
|---|---|---|
| Box Size & Depth | Shallow boxes allow more flying litter | Choose a larger or high-sided box |
| Litter Type | Fine or lightweight litters stick to paws | Try heavier or low-track formulas |
| Cat Behavior | Energetic scratching or running | Consider partial covers or mats |
| Paw Hair Length | Long fur can hold extra granules | Trim paw fur if needed, or use mats |
When I recognized these root causes, I placed a deeper box in a corner, used heavier litter, and set a wide litter mat underneath. My floors stayed far cleaner. Understanding that your cat is not being spiteful but merely following their instincts can reduce frustration. By addressing environment, box design, and litter type, you can significantly cut down on stray granules around your home.
What do you put in the bottom of a litter box?
I used to lay plastic liners and newspaper in the tray, hoping to make my life easier. My cat tore them up. I wondered if there was a better approach.
Most owners stick to just litter, usually two to three inches deep. Some try liners or pads for extra protection, but many cats dislike the noise or texture. Ultimately, well-chosen clumping litter is often enough.
Deciding on the Base Layer
At first, I believed adding extra layers would make the box tidier. In practice, it can complicate things. My cat tore through liners in days, leaving plastic scraps among the litter. That was a bigger mess than I started with. Let’s examine what really goes into the bottom of a litter box1.
The Essentials
A clumping litter, ideally unscented or lightly scented, forms the basic layer. Most experts suggest at least two inches, though bigger cats might need three. This depth gives them room to dig and bury without scraping the bottom. When litter is too shallow, waste clings to the box floor more easily.
Liners and Pads
Some people swear by liners or puppy pads. The idea is to lift the entire liner for a quick toss when changing the litter. However, many cats do not like the crinkly sound or how claws snag in the plastic. I personally found that once my cat punctured the liner, it no longer served a purpose. Puppy pads can help if your cat often urinates on the box’s edges, but they must be changed frequently to avoid odors and mold.
Natural Add-Ons
Some owners sprinkle baking soda on the bottom to absorb odors. In small amounts, it usually doesn’t bother cats, but too much can be off-putting. You could also consider odor-absorbing crystals. Just be mindful that your cat might detect changes in texture. If they react poorly, revert to plain litter.
Observing Your Cat’s Reaction
Your cat’s comfort is paramount. If you introduce a new base layer—like a puppy pad or extra foam—and notice your cat avoiding the box, revert to a simpler setup. Cats can be picky. By paying attention to their cues, you can keep them content while still aiming for simpler cleanups.
At the end of the day, a straightforward approach often works best: a good-quality clumping litter at a sufficient depth, changed out regularly. If you still struggle with caked residue, it might be a sign you are waiting too long between full cleanouts. Daily scooping plus routine box scrubs can reduce the need for liners or other additions.
A Friendly Tip
Sometimes, I found that rotating two litter boxes—so one is always freshly cleaned while the other dries—streamlines everything. My cat enjoys a pristine environment, and I save time on deep scrubbing all at once.
How do I keep the bottom of my litter box clean?
I remember prying caked litter off the plastic base, feeling annoyed by the extra work. I needed a routine that left the box fresher without constant scraping.
Daily scooping and periodic full washouts keep the bottom clean. Removing waste before it hardens stops residue from bonding to the plastic. Using clumping litter2 at the right depth also helps shield the box floor.
A Step-by-Step Maintenance System
I realized that many cat owners dread cleaning the box, leading them to put it off. That creates more buildup in the long run. Once I set a consistent schedule, the job took less time overall. Let’s break down the key steps:
1. Daily Scooping
I start each day (or end the night) by scooping out any clumps or feces. Doing it quickly means clumps stay soft and do not fuse to the box. This practice reduces smells and keeps the litter surface fresh, encouraging your cat to continue using the box.
2. Weekly or Biweekly Deep Clean
Depending on how many cats I have and the box usage, I schedule a deep clean. I empty the litter into a trash bag and set the box in a sink or bathtub. I rinse with warm water and use mild dish soap. Harsh chemicals might leave strong odors that cats hate. After a thorough scrub, I rinse again and dry it completely. A leftover damp surface can cause fresh litter to form little clumps right away.
3. Box Condition Check
Plastic boxes wear out over time, forming scratches or cracks where debris can lodge. If I notice serious damage or persistent odor, I replace the box. Some folks keep a backup box to swap in while cleaning the primary one. This keeps disruptions minimal.
4. Litter Refresh Strategy
After each deep clean, I add fresh litter. I typically fill it two to three inches deep. If your cat is tall or stands while urinating, consider a box with higher sides to protect the box base from repeated direct contact.
Table: Sample Cleaning Routine
| Action | Frequency | Reason |
|---|---|---|
| Scoop Clumps | Daily | Prevents buildup and odors |
| Top Up Litter | As needed | Maintains coverage to protect box |
| Full Box Empty & Wash | Every 1-2 weeks | Removes bacteria, refreshes area |
| Inspect for Damage | Monthly | Spots cracks or deep scratches |
| Replace Box | 6-12 months | Ensures hygienic conditions |
Sticking to this routine transformed my cleaning experience. The bottom of the box stayed noticeably clearer, requiring minimal scraping. My cat also seemed happier with a consistently fresh environment. The key is not letting the litter bottom become a hardened layer that demands heavy scrubbing. With daily or near-daily scooping, maintaining the box becomes a quick, low-stress habit.
Where do you put a cat litter mat?
I recall placing the mat a foot from the litter box, only to watch my cat step around it. The stray granules still ended up everywhere. I discovered that positioning is everything.
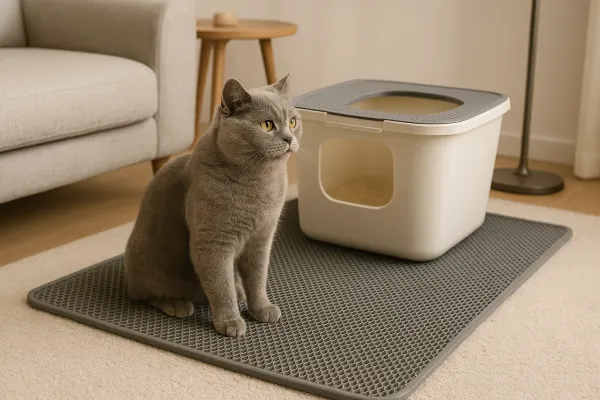
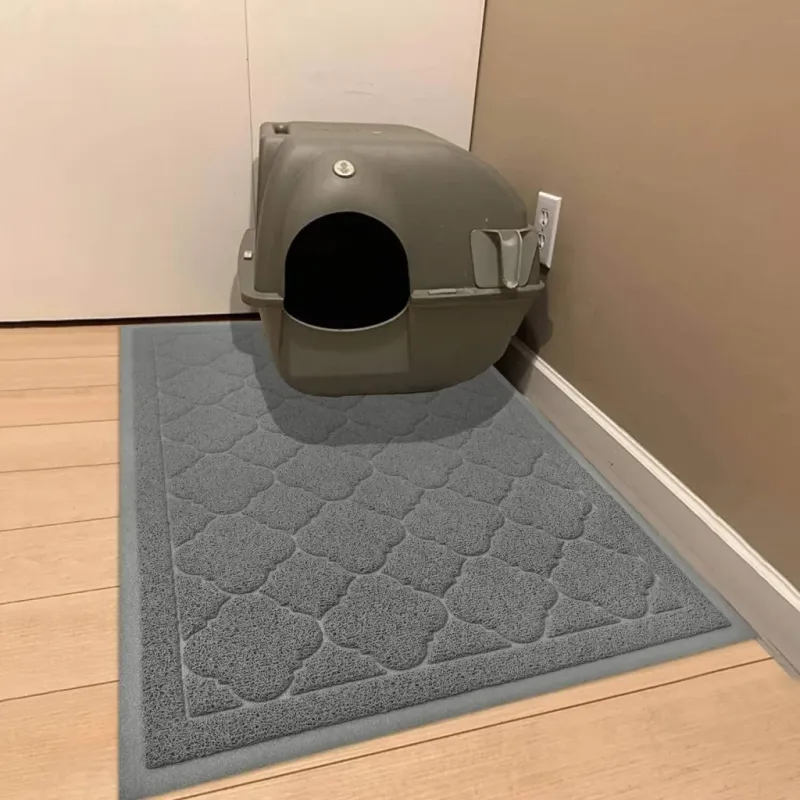
Place the litter mat directly in front of or around the box’s main entrance. The moment the cat exits, they should step onto the mat. Cover the high-traffic path to maximize the litter captured.
Strategic Mat Placement and Choices
The first time I purchased a litter mat, I casually laid it down somewhere near the box. My cat, apparently, didn’t get the memo and darted off at an angle. The mat caught almost no litter. Through trial, I discovered a few strategies:
Positioning Essentials
- Directly Under the Entrance: If your box has one opening, align the mat so it extends at least a few inches beyond that point. This ensures the cat’s front paws land on the mat. If your cat can exit the box from multiple angles, consider a larger mat or corner placement that covers all possible escape routes.
- Allow Enough Space: Some cats jump a small distance out of the box. If the mat is too close, they might skip it. A bigger mat or one with a shape that wraps around the box edges can improve coverage.
Tailoring to Your Cat’s Habits
Some cats approach the box slowly, stepping carefully back onto the mat. Others bound out in one giant leap. If you have a “high jumper,” position an oversized mat or place two smaller mats side-by-side. I found that trimming a large mat to fit around a wall corner helped funnel my cat in the direction I wanted. With time, your cat might adapt to stepping on the mat automatically.
Materials and Comfort
If your cat dislikes the texture of a coarse mat, they might actively avoid stepping on it. In such cases, try a softer rubber or fabric-topped litter mat. The key is a texture that still grips litter from paws without making your cat uncomfortable. Some mats have a gentle mesh top that feels nice to cats, encouraging them to step and linger long enough to release any clinging particles.
A Personal Tip
Before I leave the house, I often give the mat a quick shake or vacuum. That keeps new litter off it, so my cat encounters a mostly clean surface each time. When the mat is too full of litter itself, some of that debris might reattach to the cat’s paws.
Positioning your litter mat is as much about understanding your cat’s routine as it is about covering the floor. A well-placed mat can catch the majority of stray granules, saving you from the daily frustration of stepping on those gritty bits. It is a simple fix that pays off with less sweeping and more comfort for both you and your cat.
Occasionally, I set small cat treats on the mat for a few days, encouraging my cat to explore it. That quick trick helped him associate the mat with something positive. Once he got used to stepping on it, he no longer tried to detour around the edges.
Conclusion
A properly chosen litter mat, combined with the right box setup and consistent cleaning, keeps stray litter under control. It makes life simpler for you and more comfortable for your cat.