I once nearly lost my footing stepping out of the shower. I felt a flash of panic. I realized I needed a safer option fast.
A non-slip bath mat should grip surfaces, stay comfortable underfoot, and resist moisture buildup. Materials like rubber, PVC, or textured foam often excel at this job, keeping you steady on slick floors.
I remember feeling relieved the first time I stepped on a sturdy mat. Let’s dig deeper and find out what matters when choosing a non-slip bath mat.
What is the most non slip material?
I recall trying a plush rug in the bathroom. It felt cozy, but it slid around. It was a dangerous choice.
Rubber is typically the most non-slip material. It offers strong grip against tile or bathtub surfaces, even when wet. Properly textured rubber resists water, boosting stability and preventing accidents.
Exploring the Qualities of Truly Non-Slip Materials
I once grabbed a random bath mat that claimed “non slip” on the packaging. After a few showers, it curled at the edges and shifted whenever I stepped on it. That experience taught me that not all so-called “non slip” mats perform the same. Let’s break down the top contenders that reduce slipping hazards:
1. Rubber
Rubber stands out for its high friction on wet surfaces. When water splashes onto rubber, the material’s molecular structure helps maintain contact with the ground, preventing skids. Many rubber mats have suction cups that adhere to the bathtub or tiles, creating extra stability. I noticed that a rubber-backed mat often grips so well it’s tough to peel off when cleaning. The slight give of the rubber also cushions your feet, making it a comfortable choice for standing or stepping after a long shower.
2. PVC (Vinyl)1
PVC mats can be quite slip-resistant if they have a textured surface. Vinyl can mold into ridges or patterns that channel water away. Some designs include suction cups too. I’ve used a PVC mat that felt lighter than a rubber one, yet it still clung tightly to the floor. The main difference is that PVC might degrade faster under heavy use, especially if exposed to strong bathroom cleaners.
3. Silicone
Silicone-based mats are also an option. Silicone grips many surfaces well and remains flexible. Some silicone mats incorporate drain holes, preventing water pooling. They’re often used in baby bathtubs or smaller bathroom areas. However, silicone mats can be pricier.
4. Textured Foam or EVA
EVA foam is comfortable, though less durable in the long run. I’ve seen foam mats that feel soft and pleasant, but they lose some grip if soap residue builds up. Regular rinsing is crucial to keep them at peak performance.
Below is a brief table for quick reference:
| Material | Slip Resistance | Durability | Comfort Level | Typical Features |
|---|---|---|---|---|
| Rubber | Very High | High | Moderate | Suction cups, ridged top |
| PVC | High | Moderate | Moderate | Textured patterns, cups |
| Silicone | High | Moderate | Moderate | Soft, flexible, drain holes |
| EVA Foam | Moderate | Lower | High | Cushioned surface |
In my bathroom, rubber often wins for maximum grip. PVC or silicone can also provide good traction if you maintain them properly. Whichever you choose, check that the underside forms a secure seal with your floor or tub. Even the best material fails if dirt or soap film builds up beneath. Regular cleaning ensures the mat keeps you steady over time.
(Friendly Insight)
If you live in a humid climate or share the bathroom with multiple family members, pick a mat that drains or dries quickly. Accumulated moisture can undermine even the most slip-resistant surface.
Are non slip shower mats safe?
I once worried a shower mat might grow mold or shift unexpectedly, turning into a hidden hazard instead. I needed assurance that non-slip mats were truly safe.
Yes, non-slip shower mats are generally safe when correctly placed and maintained. They reduce falls in slippery tubs or floors. Regular cleaning and proper installation ensure they remain an asset, not a risk.
Ensuring True Safety with Shower Mats
When I first installed a shower mat, I felt relief, confident I had cut my fall risk. A few weeks later, I noticed a slimy layer underneath—soap scum and moisture had accumulated. This taught me that “non-slip” is only part of the safety equation. Proper upkeep, good design, and correct usage all play roles:
1. Installation and Positioning
Place the mat on a clean, smooth surface free of residue. If the tub or tiles have leftover soap or oils, the suction cups might not adhere well, causing the mat to shift. Press down firmly, removing any trapped air. Ensure the mat covers the area where you typically stand or move.
2. Material Quality
High-grade rubber or PVC shower mats are made to handle constant exposure to water, soap, and shampoo. Cheaper mats might degrade or lose grip over time. Inspect the mat for curling edges or cracks. If you see warping or peeled suction cups, it’s time for a replacement. A compromised mat can slip unexpectedly.
3. Regular Cleaning
Bacteria and mildew thrive in damp conditions. After each shower, I like to rinse the mat briefly with warm water, dislodging any soapy residue. Once a week or so, I remove the mat entirely, scrub the underside with mild detergent, and let it dry thoroughly before placing it back. This routine preserves traction and keeps the surface hygienic.
4. Considering Alternative Safety Measures
Non-slip mats are part of an overall safe bathroom setup. If you have mobility issues or are prone to dizziness, grab bars or a shower seat might help too. Some folks also install non-slip strips for added security. The idea is to minimize all possible slip points.
Below is a short table on common safety pitfalls:
| Potential Issue | Risk | Prevention Strategy |
|---|---|---|
| Soap scum under mat | Reduces suction, causes sliding | Rinse after each use, wash weekly |
| Warped or curled edges | Trip hazard | Replace mat at first sign of wear |
| Cheap or worn materials | Less reliable grip | Invest in high-quality rubber/PVC |
| Improper placement | Mat can slip or not cover needed area | Align properly in high-traffic zone |
These mats do help prevent dangerous falls, but they aren’t a one-stop solution. Stay vigilant about the mat’s condition. In my own home, consistent cleaning and checking for signs of wear turned my shower mat into a reliable ally. After all, “non-slip” truly means “low slip risk with the right care.” The payoff is peace of mind each time I step into the shower.
How do you dry a non slip shower mat?
I once left my shower mat on the wet tub floor, thinking it would air-dry. It stayed damp for hours, inviting mildew. I needed a better method.
To dry a non-slip shower mat, remove it after each use, shake off excess water, and hang it over a rail or tub edge. Ensure air circulates around it. Some mats can be machine-dried on low heat if the label allows.
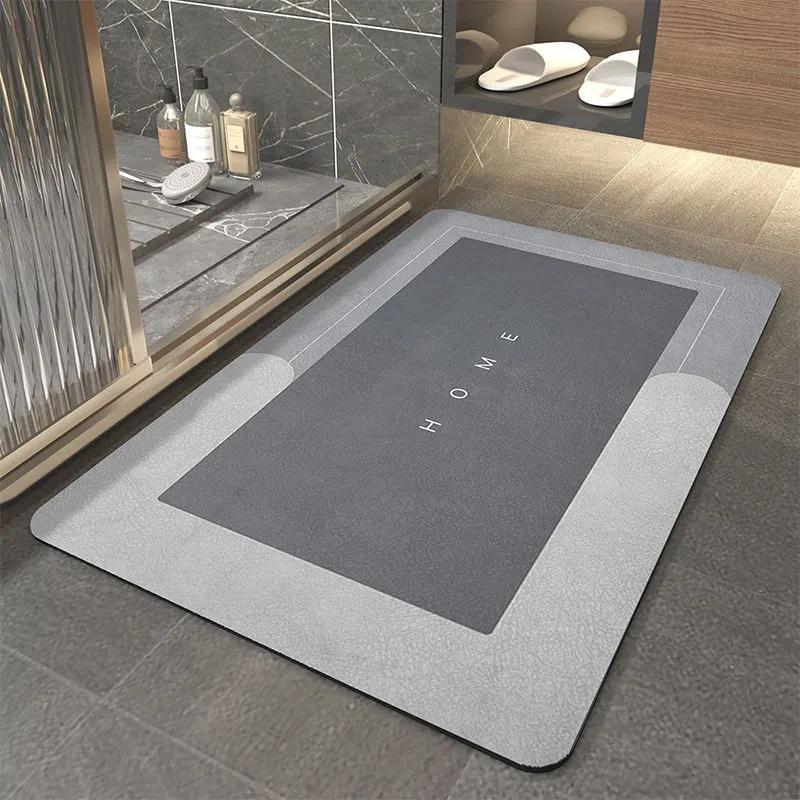
Best Practices for Drying and Maintaining a Fresh Mat
Proper drying might seem trivial, but it can make or break your bath mat’s performance and longevity. When I first started using a rubber shower mat, I believed it would simply drip-dry if I left it where it was. Instead, moisture got trapped beneath, generating a musty odor. Let’s break down why drying matters and how to do it right:
1. Mold and Mildew Prevention
A wet environment is perfect for mold and mildew growth. Once these organisms form on the underside of a mat, they not only produce unpleasant smells but can also degrade the material over time. This compromises grip, ironically making your “non-slip” mat less reliable. By lifting the mat and letting both sides air out, you disrupt microbial growth.
2. Preserving Suction Power
Suction cups or textured rubber require a clean interface with the tub. Lingering moisture or soap scum can reduce the suction effect. Drying the mat each day helps remove leftover droplets that might mix with soap residue to create a slick film.
3. Methods for Quick Drying2
- Hanging the Mat
Drape it over the edge of the bathtub, over a shower rod, or on a towel rack. This ensures water runs off quickly and that both top and bottom surfaces are exposed to air. - Towel Blotting
If you’re in a hurry, lay a towel on the ground and place the mat on it. Step or press down gently to absorb water. Flip it over and repeat. - Machine Dry
Certain mats labeled as dryer-safe can handle a low-heat cycle. High heat might warp rubber or foam, so always check instructions. If in doubt, air drying is safer. - Outdoor Sunlight
If the mat’s material is UV-stable, an hour in the sunshine can kill bacteria and speed evaporation. However, some plastics may fade or crack with prolonged sun exposure, so use caution.
Below is a short table describing different drying approaches:
| Drying Method | Time to Dry | Material Suitability | Pros |
|---|---|---|---|
| Air Dry (Hang) | Several Hours | Rubber, PVC, Silicone | Low effort, minimal cost |
| Towel Blot | Quick Spot Dry | All (check fragility) | Speeds up process, easy |
| Machine Dryer | 10-30 minutes (low heat) | Fabric, Some Rubbers or PVC | Fast, hands-off |
| Sunlight | 1-2 hours | UV-resistant materials | Helps disinfect, fresh smell |
(Personal Tip)
If you notice your mat still smells musty, try a mild solution of vinegar and water for a quick rinse. Then let it dry in open air. Vinegar helps neutralize lingering odors and removes soap film.
Proper drying isn’t just about cleanliness—it directly impacts slip resistance and overall safety. Once I established a routine of hanging my mat post-shower, I found it consistently ready for the next use. It feels satisfying to step onto a fresh, dry surface instead of a clammy one.
Conclusion
A truly non-slip bath mat depends on material quality, proper placement, and regular care. With the right choice—often rubber or textured PVC—you reduce slip risks and enjoy a safer, drier bathroom.


